Menu

Preventative Waterproofing Tips in Tampa – Protect Your Home Before Storm Season Hits

Practical, proven preventative waterproofing tips designed specifically for Tampa's subtropical climate, including DIY waterproofing techniques and moisture control best practices that stop water damage before it starts.

Slider Image 1
Slider Image 2
Slider Image 3
Slider Image 4
Slider Image 5
Slider Image 7
Slider Image 8
Slider Image 9
Slider Image 10
Slider Image 11

Why Tampa Homeowners Need Proactive Water Sealing Methods

Tampa sits in a perfect storm of water damage risk factors. The subtropical climate delivers 46 inches of rain annually, most of it concentrated between June and September when afternoon thunderstorms dump torrential rain in minutes. Add in the threat of tropical systems moving through the Gulf, and you face a relentless assault on your home's envelope.

The high humidity year-round, typically 70 to 90 percent, creates constant moisture pressure against every vulnerable joint, seam, and penetration in your structure. Condensation forms inside wall cavities. Vapor drives through porous materials. Mold spores find perfect breeding grounds in damp insulation and wood framing.

Your foundation faces unique challenges too. Tampa's sandy soils shift and settle, creating cracks in slabs and block walls. Seasonal water table fluctuations put hydrostatic pressure on basement walls and crawlspaces, forcing moisture upward through capillary action.

Most homeowners wait until they see stains, smell mildew, or discover rot. By then, the damage is done. DIY waterproofing techniques and a home waterproofing maintenance guide give you a fighting chance. Proactive water sealing methods cost far less than restoration. Moisture control best practices protect your investment and your family's health.

The key is understanding where Tampa homes fail first. Window and door flashing degrades under UV exposure. Roof penetrations around vents and chimneys develop gaps. Exterior caulking dries out and cracks. Foundation perimeter grading settles, directing water toward the structure instead of away.

You can address these vulnerabilities yourself with the right water damage prevention checklist and consistent effort.

Why Tampa Homeowners Need Proactive Water Sealing Methods
How to Implement Effective Moisture Control Best Practices

How to Implement Effective Moisture Control Best Practices

Start with your roof, because that's where most water enters Tampa homes. Inspect shingles twice yearly, before and after storm season. Look for lifted edges, missing granules, and cracked sealant. Check every roof penetration. Vent boots crack. Chimney flashing separates. Skylight seals deteriorate under constant sun exposure.

Clean your gutters quarterly. Tampa's oak trees drop leaves year-round, and clogged gutters overflow directly onto fascia boards and foundation perimeter. Install gutter guards if you want to reduce this maintenance cycle. Verify downspouts discharge at least six feet from the foundation. Use splash blocks or underground extensions to carry water completely away from the structure.

Exterior caulking requires annual attention. Inspect every window and door frame. Check where different materials meet, like brick to wood trim or stucco to foundation. Look for gaps around electrical meters, hose bibs, and AC line penetrations. Remove old, failed caulk completely before applying new material. Use polyurethane or tripolymer caulk rated for exterior use in Florida's climate.

Your foundation perimeter needs proper grading. The soil should slope away from the house at least six inches over ten feet. Fill any depressions where water pools after rain. Consider French drains if you have persistent drainage issues.

Interior moisture control matters just as much. Run exhaust fans during and after showers. Vent your dryer outside, never into the attic or garage. Use dehumidifiers in crawlspaces and basements to keep relative humidity below 50 percent. Fix plumbing leaks immediately, even small drips that seem minor.

These proactive water sealing methods form your first line of defense against Tampa's aggressive moisture environment.

Your DIY Waterproofing Action Plan

Preventative Waterproofing Tips in Tampa – Protect Your Home Before Storm Season Hits
01

Exterior Envelope Assessment

Walk your home's perimeter during daylight, examining every potential water entry point. Document problem areas with photos and notes. Check roof edges, wall penetrations, window frames, and foundation cracks. Look for staining, efflorescence, or vegetation growth that signals chronic moisture exposure. Create a prioritized list based on severity and accessibility.
02

Systematic Sealing and Repair

Address issues from top to bottom. Start with roof repairs and gutter improvements. Move to wall penetrations and window resealing. Finish with foundation work and grading corrections. Use appropriate materials for each application: elastomeric coatings for masonry, polyurethane caulk for joints, hydraulic cement for foundation cracks. Work during dry weather for proper curing.
03

Ongoing Monitoring Schedule

Establish a quarterly inspection routine using your water damage prevention checklist. Document conditions with dated photos to track deterioration over time. Schedule seasonal maintenance before summer storms and winter cold fronts. Monitor interior humidity levels and address any increases immediately. Keep maintenance records to identify recurring problem areas that need professional attention.

Why Tampa Homeowners Trust Local Waterproofing Expertise

You can handle significant preventative waterproofing yourself, but knowing when to call professionals separates smart homeowners from those facing expensive restoration bills. Fortress Water Damage Restoration Tampa understands the difference between DIY maintenance and structural issues requiring specialized knowledge.

Tampa's building codes have evolved specifically to address our climate challenges. The Florida Building Code requires specific flashing details, vapor barrier installations, and moisture management strategies. Many older homes predate these requirements. We see the patterns: homes built before Hurricane Andrew lack proper roof-to-wall connections, pre-2000 construction often has inadequate attic ventilation, and older block foundations lack proper waterproofing membranes.

Our technicians recognize the signs of hidden moisture intrusion that homeowners miss. Thermal imaging reveals wet insulation behind walls. Moisture meters detect elevated levels in framing before visible damage appears. We understand how Tampa's afternoon thunderstorms create pressure differentials that drive water through building assemblies in unexpected ways.

The local knowledge matters. We know which neighborhoods have high water tables. We understand how the Hillsborough River's proximity affects certain areas. We've worked in every architectural style from historic bungalows in Seminole Heights to modern construction in New Tampa. Each building type has specific vulnerabilities.

When your DIY waterproofing techniques reveal problems beyond simple sealing and caulking, we provide the next level of intervention. We install proper drainage systems, repair failed building envelope components, and implement moisture control solutions that address root causes rather than symptoms.

Tampa homeowners appreciate that we educate rather than upsell. If your home waterproofing maintenance guide can handle an issue, we tell you. When you need professional help, we explain exactly why and show you the evidence.

What Your Preventative Waterproofing Program Should Include

Seasonal Inspection Timeline

Your water damage prevention checklist should align with Tampa's weather patterns. Conduct thorough inspections in April before storm season and November after hurricane threats pass. Add quarterly quick checks in January and July. This schedule catches developing problems before they become urgent. Each inspection takes 45 minutes to two hours depending on home size. Focus on areas where you've had previous issues or where age and wear create vulnerability. Document everything with photos and dates to track deterioration rates and maintenance effectiveness over time.

Critical Assessment Areas

Your home waterproofing maintenance guide must cover specific zones. Start with the roof membrane and flashing details. Examine attic ventilation and check for condensation staining. Inspect all wall penetrations for gaps or failed sealant. Test window and door weather stripping. Check foundation walls for cracks and efflorescence. Evaluate perimeter grading and drainage patterns. Examine basement or crawlspace conditions including humidity levels and standing water. Look at interior spaces for discoloration, musty odors, or material deterioration. Each area requires different evaluation criteria and remediation approaches based on the specific failure mechanism you discover.

Proper Material Selection

Tampa's climate destroys inappropriate waterproofing materials quickly. Use polyurethane or tripolymer exterior caulks rated for high UV exposure and temperature extremes. Choose elastomeric coatings for masonry that can bridge hairline cracks. Select hydraulic cement for foundation repairs that need to cure in damp conditions. Install stainless steel fasteners in coastal areas to prevent corrosion. Use marine-grade silicone for areas with constant water exposure. Apply fungicidal primers before painting in moisture-prone areas. The right materials cost more initially but last years longer in Florida's aggressive environment, reducing your long-term maintenance burden significantly.

When to Escalate to Professionals

Proactive water sealing methods have limits. Call professionals when you find active leaks you cannot source, structural cracks wider than one-quarter inch, recurring moisture problems despite repeated DIY fixes, elevated moisture meter readings in concealed spaces, visible mold growth covering more than ten square feet, or sagging or bowing structural elements. These conditions indicate failures beyond surface sealing. Professional assessment includes moisture mapping, thermal imaging, destructive investigation when needed, and engineered solutions. We develop comprehensive remediation plans that address underlying causes. Fortress Water Damage Restoration Tampa provides this expertise throughout the greater Tampa metro area.

Frequently Asked Questions

You Have Questions,
We Have Answers

What to do before waterproofing? +

Before waterproofing in Tampa, inspect your foundation and walls for existing cracks, gaps, or moisture intrusion. Clean all surfaces thoroughly to remove dirt, mold, and loose debris. Check your gutters and downspouts to ensure proper drainage away from the foundation. In Tampa's humid climate, use a moisture meter to detect hidden dampness in concrete or block walls. Identify the water source, whether it's surface runoff, groundwater pressure, or poor grading. Fix any active leaks before applying waterproofing products. Document problem areas with photos. This preparation ensures your waterproofing system adheres properly and addresses the root cause, not just the symptoms.

What are common waterproofing mistakes? +

Common waterproofing mistakes in Tampa include applying products to wet or dirty surfaces, which prevents proper adhesion. Many homeowners skip crack repair before waterproofing, allowing water to bypass the membrane. Using the wrong product for your specific foundation type or water pressure level fails quickly. Ignoring exterior drainage problems like negative grading or clogged gutters means water still pools against your foundation. In Tampa's sandy soil, failing to address hydrostatic pressure from the water table causes persistent seepage. Applying too thin a coat or skipping recommended cure times between layers reduces effectiveness. Not extending waterproofing below the frost line or to proper depth allows water infiltration underneath the treated area.

Should you prime before waterproofing? +

Yes, priming before waterproofing is critical for proper adhesion and performance. Primer seals porous concrete or masonry surfaces, creating a uniform base that helps waterproofing membranes bond correctly. In Tampa's climate, concrete block and poured foundations absorb moisture differently. Primer equalizes this absorption rate and fills surface pores. For below-grade applications, primer creates a bridge between the substrate and waterproofing membrane, reducing the risk of delamination. Skip primer and your waterproofing may peel, bubble, or fail prematurely. Always follow the manufacturer's specifications for compatible primers. Allow full drying time before applying waterproofing coats. This step adds minimal cost but dramatically extends the life of your waterproofing system.

What is the best waterproofing method? +

The best waterproofing method for Tampa depends on your specific situation. For exterior foundation walls, a rubberized asphalt membrane combined with drainage board provides excellent protection against hydrostatic pressure from our high water table. Crystalline waterproofing works well for porous concrete, penetrating deep to seal capillaries from within. For above-grade applications like balconies or planters, liquid-applied membranes offer flexibility and seamless coverage. Interior waterproofing using epoxy or urethane injections stops active cracks effectively. The most reliable approach combines exterior waterproofing with proper grading, functioning gutters, and French drains. No single product solves every problem. A proper assessment determines which method addresses your water source and foundation type.

How do you prepare for waterproofing? +

Prepare for waterproofing by clearing the work area of landscaping, stored items, and debris. Excavate around the foundation if doing exterior waterproofing, exposing the full height of the basement or crawl space walls. Pressure wash surfaces to remove dirt, efflorescence, and old coatings. Repair cracks with hydraulic cement or polyurethane injection. In Tampa's humidity, allow surfaces to dry completely or use products designed for damp substrates. Install or repair footer drains before waterproofing. Check that downspouts discharge at least six feet from the foundation. Cover HVAC units and protect windows. Gather proper safety equipment including respirators for solvent-based products. Schedule work during Tampa's dry season when possible for optimal curing conditions.

What is the negative side of waterproofing? +

The negative side of waterproofing includes the upfront cost and disruption to your property. Exterior waterproofing requires excavation, which damages landscaping and requires restoration. Some waterproofing products emit strong fumes during application and curing, requiring ventilation. In Tampa's heat, extended cure times can delay project completion. Interior waterproofing systems like drainage channels alter your basement floor and require ongoing sump pump maintenance. Waterproofing addresses symptoms but may not fix underlying drainage problems. Poor application traps moisture inside walls, causing hidden damage. Some products fail in high hydrostatic pressure situations common near Tampa's waterways. Waterproofing also requires periodic inspection and maintenance to remain effective. However, these drawbacks pale compared to ongoing water damage costs.

How many coats of waterproofing should I do? +

Most waterproofing systems require two coats minimum for adequate protection. The first coat seals the substrate and fills minor imperfections. The second coat ensures complete coverage and achieves the specified mil thickness for waterproofing performance. In Tampa's climate with high humidity and frequent rain, three coats provide better long-term protection, especially for below-grade applications facing groundwater pressure. Apply each coat perpendicular to the previous one to cover any thin spots or pinholes. Follow manufacturer cure times between coats, typically 24 hours but longer in humid conditions. High-traffic areas like basement floors may need additional coats. Check product specifications for required thickness. Skimping on coats to save money guarantees premature failure and costlier repairs later.

What causes waterproofing to fail? +

Waterproofing fails due to poor surface preparation, improper product selection, or application errors. In Tampa, applying waterproofing to damp surfaces prevents proper bonding. Skipping primer on porous block allows the membrane to separate. Using the wrong product for your water pressure level, like coating when a full membrane system is needed, leads to seepage. Cracks in the foundation move and tear rigid waterproofing products. Hydrostatic pressure from Tampa's high water table pushes through inadequate systems. UV exposure degrades certain products on above-grade applications. Punctures during backfill compromise membranes. Failed seams in sheet membranes create leak paths. Ignoring exterior drainage means water overwhelms even quality waterproofing. Product degradation over time requires maintenance and eventual replacement.

What is the best negative side waterproofing? +

The best negative side waterproofing for Tampa foundations combines a bentonite clay or rubberized asphalt membrane applied to the interior face of the foundation wall with an interior drainage system. This approach works when exterior excavation is impossible due to property lines, landscaping, or structural concerns. Crystalline waterproofing injected into concrete pores provides another negative-side option, sealing from within. For active seepage, install a drainage channel at the floor-wall joint connected to a sump pump system to manage hydrostatic pressure from our water table. Negative side systems cost less than exterior excavation but manage water rather than stopping it completely. They work best combined with improved exterior grading and gutter systems to reduce water volume.

What is the best time to do water waterproofing? +

The best time for waterproofing in Tampa is during our dry season from November through April when humidity drops and rain is less frequent. Waterproofing products require dry surfaces and specific temperature ranges for proper curing. Tampa's summer humidity and afternoon thunderstorms extend cure times and risk product washout. Exterior waterproofing needs several consecutive dry days. Plan interior work when you can ventilate properly without letting in moisture. Avoid waterproofing during active leaks. Fix the immediate problem first, then waterproof during dry conditions. If you face urgent water damage, temporary measures like sump pumps or exterior grading can buy time until conditions improve. Schedule excavation work when ground conditions allow equipment access without creating mud pits.

How Tampa's Subtropical Climate Demands Year-Round Waterproofing Vigilance

Tampa receives more lightning strikes per square mile than anywhere else in North America. Those afternoon thunderstorms from June through September deliver intense rainfall rates that overwhelm inadequate drainage systems in minutes. Your gutters and downspouts face 46 inches of annual rainfall, but it arrives in concentrated bursts rather than gentle soaking rains. The combination of high heat, humidity averaging 75 percent, and frequent temperature swings creates constant expansion and contraction in building materials. Caulking and sealants deteriorate faster here than in temperate climates. Moisture control best practices that work in other regions fail quickly in Tampa's aggressive environment without adaptation and frequent maintenance.

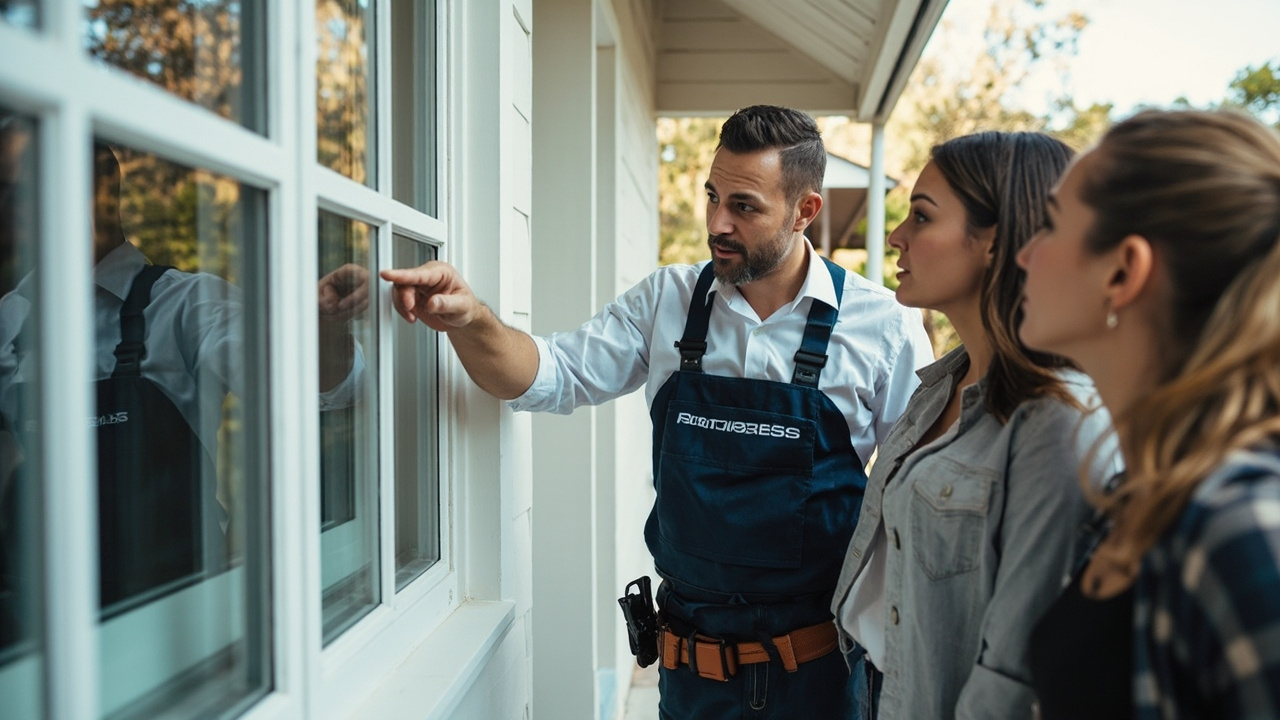
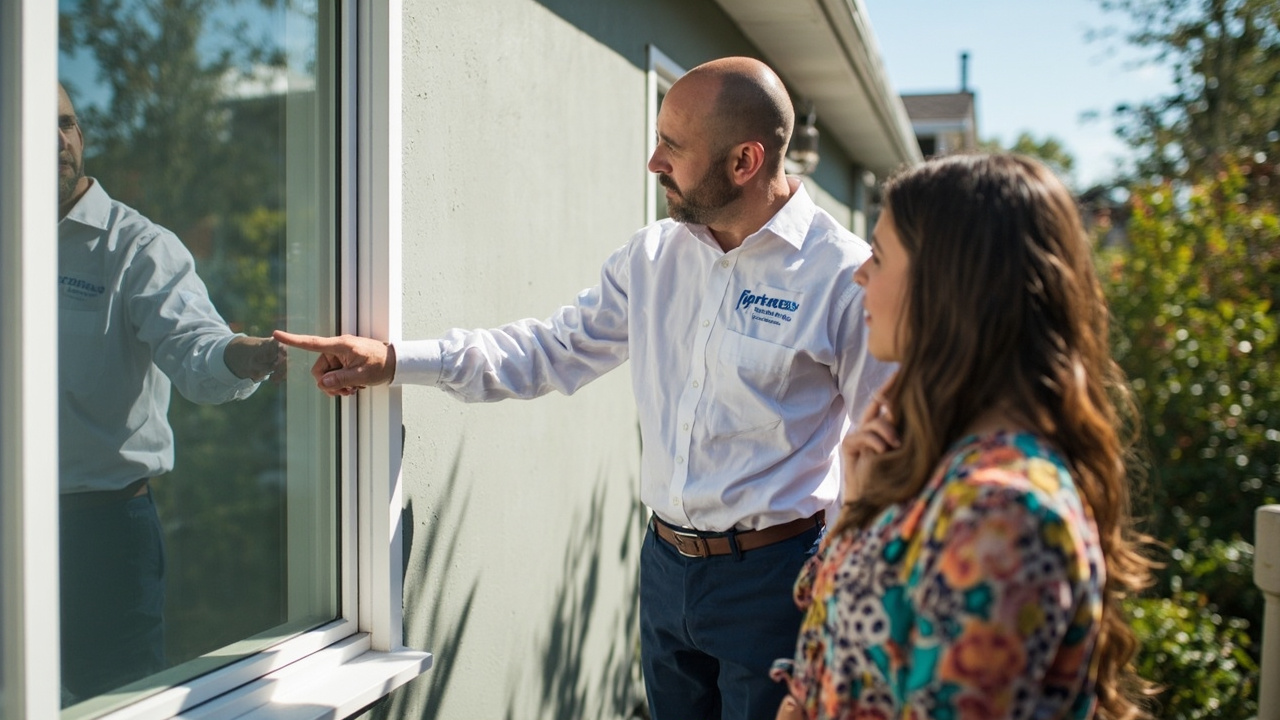
Local building professionals understand Tampa's specific challenges because we live and work here daily. We see how afternoon storms drive rain horizontally into west-facing walls. We know which subdivisions have poorly compacted fill that settles and cracks foundations. We understand how the shift from dry season to wet season affects water tables and hydrostatic pressure. Fortress Water Damage Restoration Tampa brings this localized expertise to every consultation. Our technicians recognize the early warning signs specific to Tampa construction methods and climate impacts. We help homeowners implement DIY waterproofing techniques appropriate for our conditions while providing professional intervention when needed. This combination of preventative guidance and expert backup protects Tampa homes more effectively than generic advice.

Water Damage Restoration Services in The Tampa Area

We proudly serve the entire Tampa area with rapid-response water damage restoration services. Whether you’re downtown, in the suburbs, or operating a business near the bay, our expert team is just minutes away. Use the map below to view our service zone or find our nearest location. We’re ready to respond wherever you need us. Your peace of mind is only a call or click away.

Address:
Fortress Water Damage Restoration Tampa, 4830 W Kennedy Blvd #600, Tampa, FL, 33609

Additional Services We Offer

Our news updates

Latest Articles & News from The Blogs

Lorem ipsum dolor sit amet. Aut expedita quaerat quo eligendi numquam et laudantium perspiciatis qui minima expedita rem consequatur ducimus.…

Test Blog 4

Lorem ipsum dolor sit amet. Aut expedita quaerat quo eligendi numquam et laudantium perspiciatis qui minima expedita rem consequatur ducimus.…

Test Blog 3

Lorem ipsum dolor sit amet. Aut expedita quaerat quo eligendi numquam et laudantium perspiciatis qui minima expedita rem consequatur ducimus.…

Test Blog 2

Lorem ipsum dolor sit amet. Aut expedita quaerat quo eligendi numquam et laudantium perspiciatis qui minima expedita rem consequatur ducimus.…

Contact Us

Stop hoping your home stays dry and start protecting it systematically. Call Fortress Water Damage Restoration Tampa at (656) 219-8088 for a professional assessment that identifies your specific vulnerabilities and creates a prioritized action plan.